About 10L0L Universal Golf Cart Headlight Push Pull Switch Installation
1.Turn off the golf cart and remove the key from the ignition to prevent any accidental electrical discharge during the installation process.
2.Locate the existing headlight wiring on the golf cart. This is typically found near the front of the vehicle, near the headlights themselves.
3.Use wire strippers to strip a small section of insulation from each of the headlight wires. This will allow you to connect them to the new switch.
4.Take the new headlight switch and determine which wire is the power wire. This is typically the wire that is marked with a red or black stripe. Connect this wire to the positive (+) terminal of the battery or to another power source on the golf cart.
5.Connect the remaining headlight wires to the appropriate terminals on the switch. The wiring diagram that came with the switch will indicate which wires go where.
6.Once all the wires are connected, test the headlights by turning the new switch on and off a few times. If the lights turn on and off as expected, the installation is complete.
7.Finally, tidy up any loose wires and make sure they are securely fastened to prevent them from becoming a hazard while driving the golf cart.
It's important to note that the installation process may vary depending on the specific make and model of the golf cart, as well as the type of headlight switch being installed. Be sure to refer to the manufacturer's instructions for specific details on your particular installation. If you are unsure about any aspect of the installation, it's always a good idea to consult a professional.
10L0L Related Products Recommended:
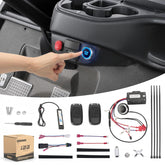
10L0L Universal Golf Cart Headlight Push Pull Switch

