How do you install LED strip lights step by step?
Installing LED light strips on a golf cart can be a great way to enhance visibility and add a stylish touch to your vehicle. Here's a step-by-step guide on how to install LED light strips on a golf cart:
-
Gather the necessary materials:
- LED light strips: Choose high-quality waterproof golf cart LED light strips suitable for outdoor use.
- Power source: Determine whether your golf cart has an available power source or if you need to install a separate battery or converter.
- Connectors and wires: Depending on the length and configuration of your LED light strips, you may need connectors and wires to connect and extend them.
- Mounting clips or adhesive tape: Decide on the method you'll use to secure the LED light strips to your golf cart.
-
Plan your installation:
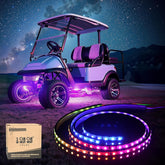
- Determine where you want to place the LED light strips on your golf cart. Common locations include under the body, along the roofline, or underneath the seats.
- Measure the length of the areas where you'll be installing the LED light strips to ensure you have enough material.
- Consider the wiring route and accessibility to the power source.
-
Prepare the installation area:
- Clean the surface where you'll be mounting the LED light strips to ensure proper adhesion.
- If using mounting clips, attach them to the desired locations according to the spacing needed for your LED light strips.
-
Cut and connect the LED light strips (if necessary):
- LED light strips typically come in rolls and can be cut to the desired length at designated cutting points. Follow the manufacturer's instructions to cut the LED light strips without damaging them.
- If you need to extend the length or connect multiple sections of LED light strips, use connectors and wires to make the necessary connections. Follow the manufacturer's instructions for proper connection techniques.
-
Connect to the power source:
- Determine the type of power source you'll be using for your LED light strips. If your golf cart has an available power source, such as a battery or converter, you can connect the LED light strips directly.
- If you need to install a separate battery or converter, follow the manufacturer's instructions for proper wiring and connection.
-
Test the installation:
- Once the LED light strips are connected to the power source, turn on the power to ensure that the lights are functioning correctly.
- If any issues arise, double-check the connections and troubleshoot accordingly.
-
Mount the LED light strips:
- If using adhesive tape, remove the backing and carefully press the LED light strips onto the desired surface, ensuring they are straight and secure.
- If using mounting clips, slide the LED light strips into the clips and secure them in place.
-
Fine-tune the installation:
- Adjust the positioning of the LED light strips if necessary to achieve the desired lighting effect and visibility.
- Hide any visible wires or connectors for a cleaner appearance.
-
Enjoy your golf cart LED light strips:
- Once everything is in place, turn on the power and enjoy the enhanced visibility and stylish illumination provided by your newly installed LED light strips.
Remember to follow safety guidelines, consult the manufacturer's instructions for specific installation requirements, and adhere to any local regulations regarding the use of LED lights on golf carts.


