10L0L 2+2 Passenger Golf Cart Enclosure Installation Tutorial
Sure! Here's a step-by-step installation tutorial for a 10L0L 2+2 passenger golf cart enclosure:
Materials needed:
- 10L0L 2+2 passenger golf cart enclosure (including all parts and hardware)
- Golf cart with a rear-facing seat (2+2 passenger configuration)
- Basic hand tools (screwdriver, wrenches, etc.)
Step 1: Unbox and inspect the enclosure Carefully unbox the 10L0L golf cart enclosure and lay out all the parts and hardware. Inspect the enclosure for any damage or missing parts. Make sure you have all the necessary components, including the front and rear panels, side panels, roof, frame, and all necessary hardware.
Step 2: Assemble the frame Using the provided instructions, assemble the frame of the golf cart enclosure. This typically involves connecting the front and rear panels to the roof and side panels using screws, nuts, and bolts. Follow the instructions carefully to ensure the frame is properly aligned and securely assembled.
Step 3: Install the front panel Attach the front panel of the enclosure to the front of the golf cart using the provided hardware. This may involve screwing the front panel to the front windshield frame or other attachment points on the golf cart. Make sure the front panel is centered and securely fastened.
Step 4: Install the side panels Attach the side panels of the enclosure to the sides of the golf cart using the provided hardware. This may involve securing the side panels to the golf cart frame, roof, or other attachment points. Make sure the side panels are properly aligned and securely fastened.
Step 5: Install the rear panel Attach the rear panel of the enclosure to the rear of the golf cart using the provided hardware. This may involve screwing the rear panel to the rear windshield frame or other attachment points on the golf cart. Make sure the rear panel is centered and securely fastened.
Step 6: Adjust and tighten all hardware Once all the panels are installed, go back and double-check that all the hardware is properly tightened. Use a wrench or screwdriver to ensure all bolts, nuts, and screws are securely fastened, but be careful not to overtighten and damage the enclosure or golf cart.
Step 7: Test and adjust fit With the enclosure fully installed, test the fit by opening and closing doors, windows, and zippers to ensure they operate smoothly. Make any necessary adjustments to align panels or tighten hardware as needed to achieve a proper fit.
Step 8: Final inspection Perform a final inspection of the entire installation to ensure that all panels are securely fastened, doors and windows are properly aligned and functional, and there are no gaps or loose components. Confirm that the golf cart enclosure is installed safely and correctly.
And that's it! Following these steps should result in a properly installed 10L0L 2+2 passenger golf cart enclosure. Enjoy your enclosed golf cart and stay protected from the elements during your rounds of golf or other outdoor activities!
10L0L Related Products Recommended:
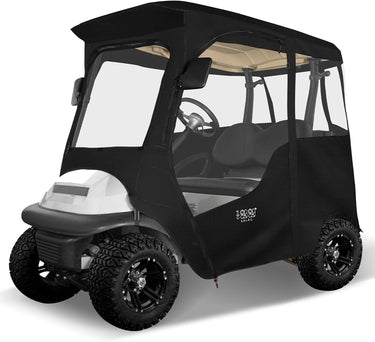
10L0L 4 Passenger Golf Cart Covers



Leave a comment
Please note, comments need to be approved before they are published.